The Iron Trick That Saved My $50 Table: Erasing Heat Rings Without Sanding
Extract trapped moisture from wood finishes in minutes using a household iron and a cotton cloth, avoiding the cost and labor of full refinishing.

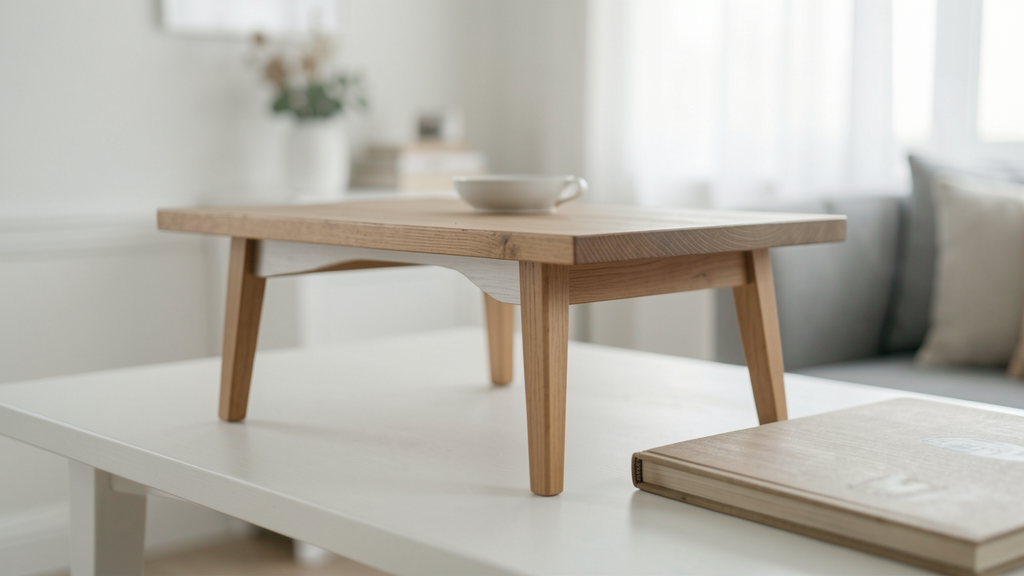
Last Tuesday, my roommate placed a piping hot casserole dish directly on the mid-century oak dining table I scored from a estate sale in Jersey City. The result was a ghostly white bloom, roughly the size of a dinner plate, mocking me from the center of the surface. For a split second, I considered sanding the entire top down to raw wood, a project that would consume my entire weekend and about $80 in supplies. I have been there before, spending days stripping a piece only to lose the patina that gave it character in the first place. But before I dragged the sander out of the closet, I decided to try a physics hack that costs literally nothing and takes about ten minutes.
Most people panic when they see these white spots, assuming the wood itself is burned or stained. In reality, the issue is usually trapped moisture within the finish. The heat from the dish drives moisture into the lacquer or varnish, creating a milky haze where the water is sandwiched between the wood and the topcoat. If you have ever wondered how to reverse that damage without turning a simple repair into a massive restoration project, the answer is likely sitting in your laundry room.
Why the Finish Clouds Over
To fix the problem, you have to understand exactly what went wrong. That white ring is not actually a stain on the wood fibers; it is a refraction of light caused by moisture trapped within the clear coat. Most modern and vintage furniture finishes—whether nitrocellulose lacquer, shellac, or polyurethane—are somewhat permeable. When a hot, moist object sits on the surface, it expands the finish slightly and forces water vapor into the tiny pores of the coating. Once the object is removed and the finish cools, that moisture is locked inside, looking like a permanent fog.
If the stain is black or dark brown, the water has penetrated through the finish and stained the actual wood fibers. Unfortunately, the iron method will not help you there; that scenario requires bleaching or sanding. But if the mark is cloudy or white, you are dealing with a "blush" in the finish. By applying controlled heat, we are essentially going to reverse the process. We will evaporate the trapped moisture and force it out of the finish, allowing the clear coat to return to its transparent state.
I have seen this happen on everything from glossy IKEA sideboards to authentic 1950s teak credenzas. The material of the table matters less than the type of damage. Just last month, I used this exact technique to rescue a roadside find I was turning into a high-end credenza, saving me from having to strip the original veneer.
Preparing Your Workstation
You cannot just grab an iron and start blasting away. There is a real risk of damaging the wood if you skip the prep work. Before you plug anything in, clear the table completely. You need a clean, dry surface to work with so you do not grind dust or crumbs into the finish while you work.
Give the entire tabletop a thorough cleaning. I use a damp microfiber cloth followed immediately by a dry one to remove any grease or residue. If the table has a wax buildup on it, you might need to wipe it down with mineral spirits to ensure you are working directly on the sealed surface. Let the table dry completely. Any water on the surface when you start this process will counteract what you are trying to achieve.
Next, select your protective barrier. This is the most critical step. You need a thick, smooth cotton cloth. An old t-shirt works, but a clean pillowcase or a flour sack towel is better because it lacks seams that could imprint on the finish under heat. Do not use polyester or synthetic blends. They will melt and create a sticky mess that is far harder to remove than a water ring. I prefer using a white cloth so I can see if any finish color is transferring, though this is rare with white heat rings.
The Heat Transfer Method
Now for the execution. Plug in your iron and set it to the lowest heat setting that still produces steam, usually the "Synthetic" or "Silk" setting. Empty the water reservoir. This sounds contradictory, but you do not want to add steam; you want dry heat. Steam adds more moisture, which is the opposite of what we need. Set the iron to "Dry" mode or just ensure there is no water in it to leak out.
- Position the Cloth: Fold your cotton cloth several times to create a thick pad. Place it directly over the white heat ring. Ensure the cloth is large enough to cover the stain completely with at least an inch of overlap on all sides.
- Initial Contact: Place the iron on top of the cloth. Do not press down. Let the iron sit there for about 5 to 10 seconds. You want the heat to penetrate the cloth and reach the finish, but you do not want to scorch the wood.
- Circular Motion: Lift the iron and check the cloth to make sure it isn't scorching. If it is cool, place the iron back down and begin moving it in slow, gentle circles over the stained area. Keep the iron moving constantly. Think of it as polishing the surface rather than ironing a shirt.
- Monitor the Progress: Every 20 seconds or so, lift the iron and peel back the corner of the cloth to check the stain. You will often see the white ring fading before your eyes. If the stain is stubborn, you can slightly increase the heat setting, but never go above medium heat.
- The Final Pass: Once the stain has vanished, remove the cloth and buff the area immediately with a clean, dry cloth to remove any residual heat and bring back the sheen.
If you have a very stubborn ring, you may need to repeat this process two or three times. Patience is key here. I once spent fifteen minutes on a single stain on a mahogany desk, refusing to turn up the heat to avoid damaging the veneer, and it eventually disappeared.
Assessing the Results and Potential Pitfalls
There is a trade-off with this method. While it is highly effective, it relies on the finish being in good enough condition to bounce back. If the heat ring is accompanied by cracks in the lacquer, known as crazing, the iron might make the cracks more visible as the finish expands and contracts. You have to inspect the damage closely. If the finish is already flaking or peeling, applying heat is not the right move.
I also need to be honest about the "sheen" factor. Sometimes, this process can flatten the gloss of the original finish slightly, especially if the original coat was very thick and old. You might find that the repaired area is perfectly clear but a tiny bit duller than the surrounding table. This is easily fixed with a little paste wax, which I will get into in a moment.
Avoid the temptation to use a hair dryer. Hair dryers blow air, which moves dust around and does not transfer heat efficiently enough to pull moisture out of the finish. The weight and thermal mass of an iron is what makes this work. Conversely, do not use a heat gun. Heat guns are for stripping paint; they are far too aggressive for this delicate task and will blister the finish instantly.
If you try this method and the white ring remains stubborn, it is possible the moisture has penetrated deeper than the finish. At that point, you might be looking at a more intensive repair involving a very light sanding of the topcoat. However, always test the least invasive method first. Many people jump to sanding when it is unnecessary, stripping away history and layers of stain that can never be perfectly replicated. I wrote about this phenomenon regarding the myth that you must always strip old furniture down to bare wood, and how destructive it can be to the piece's value and aesthetic.
Sealing and Protecting the Wood
Once the ring is gone, the table is technically "cured," but it is now vulnerable. The heat process may have slightly dehydrated the finish in that specific spot. To even out the appearance and protect the surface, apply a high-quality furniture paste wax. I prefer a beeswax and Carnauba blend. Use a lint-free cloth to apply a thin coat over the entire tabletop, not just the repaired spot. This ensures sheen consistency.
Buff the wax after it has hazed over, usually following the manufacturer's instructions—typically 15 to 20 minutes. This not only restores the glow but provides a protective barrier against future heat and moisture mishaps. It makes the surface slippery enough that if a hot dish is placed on it, you can slide a trivet underneath before damage occurs.
Looking at the cost breakdown, this repair is unbeatable. A professional furniture restorer would charge anywhere from $150 to $300 to come to your home or strip and refinish a tabletop. The materials required for this method—a cotton cloth you already own and electricity—total less than a dollar. Even if you need to buy a can of paste wax, you are out about $12. That fits well within our editorial policy of achieving a massive aesthetic improvement for pennies on the dollar compared to the "inspiration" of a brand-new table.
Embracing the Imperfect
Living with furniture means living with the evidence of life happening around it. We are often sold a vision of the perfect home where nothing ever spills, scratches, or scalds, but that is a fantasy, especially for those of us curating our homes on a budget with vintage or thrifted pieces. The white heat ring is not a defect; it is a memory of a dinner party, a lazy Sunday morning coffee, or a busy weeknight.
This iron trick is not just about saving money or avoiding sandpaper. It is about respecting the materials and the history of the objects we choose to live with. By learning to repair small imperfections ourselves, we stop seeing accidents as disasters that necessitate replacement. Instead, they become manageable blips in the lifespan of a beloved object.
My oak dining table still has a few nicks on the legs, and the leaf extension is a slightly different shade than the rest of the top. But that white ring is gone, erased by a little bit of heat and patience. It sits in my dining room, ready for the next dinner party, secure in the knowledge that I can handle whatever hot casserole dish comes its way.
Read next

The Harsh Truth About Stripping Furniture Down to Bare Wood
Stop ruining your weekends with toxic chemical strippers when a simple deglosser or bonding primer can give you a flawless finish in half the time.

Can You Actually Transform a $30 Roadside Dresser into a Designer Credenza?
By strategically replacing the legs, hardware, and finish of a generic MDF dresser, you can achieve a luxury aesthetic for 90% less than retail.